NAT Global Configuration
Figure 1. NAT Global Configuration

| Screen Objective | This screen allows the user to configure the NAT Global Configuration. |
| Navigation |
|
| Fields |
|
| Buttons |
|
This section describes Network Address Translation (NAT).
Network Address Translation (NAT) is a method by which IP addresses are mapped from one realm to another, in an attempt to provide transparent routing to hosts. RFC 2663
The need for IP Address translation arises when a network's internal IP addresses cannot be used outside the network either because they are invalid for use outside, or because the internal addressing must be kept private from the external network.
Address translation allows hosts in a private network to transparently communicate with destinations on an external network and vice versa.
NAT binds addresses in private network with addresses in global network and vice versa to provide transparent routing for the datagrams traversing between address realms. The binding in some cases may extend to transport level identifiers (such as TCP/UDP ports). Address binding is done at the start of a session. There are two types of address assignments: static and dynamic. In the case of static address assignment, there is one-to-one address mapping for hosts between a private network address and an external network address for the lifetime of NAT operation.
Destination network address translation (DNAT) is a technique for transparently changing the destination IP address of an end route packet and performing the inverse function for any replies.
To access NAT screens, go to .
| Screen Objective | This screen allows the user to configure the NAT Global Configuration. |
| Navigation |
|
| Fields |
|
| Buttons |
|
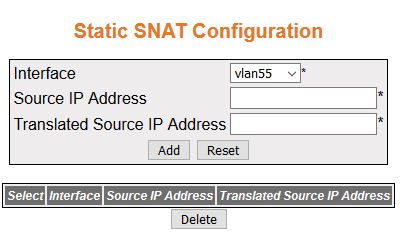
| Screen Objective | This screen allows the user to configure the static mapping between local IP address and translated IP address on a particular interface. |
| Navigation |
|
| Fields |
|
| Buttons |
|
| Screen Objective | This screen allows the user to enable DNAT for all protocols (TCP/UDP) and ports on a particular interface. |
| Navigation |
|
| Fields |
|
| Buttons |
|
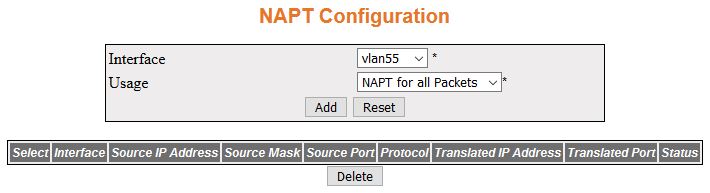
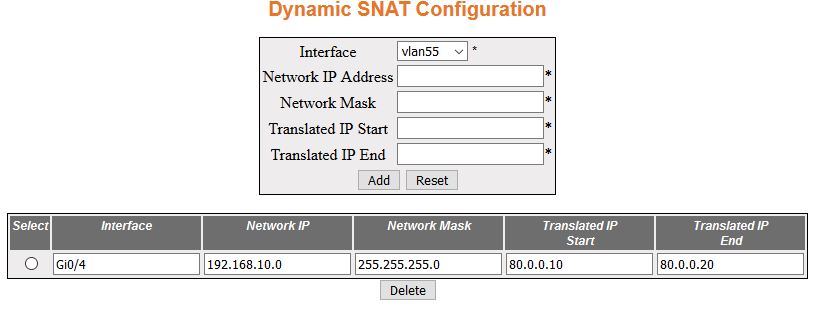
| Screen Objective | This screen allows the user to enable Network Address Port Translation (NAPT) for a particular interface with options for network translation and single IP translation. |
| Navigation |
|
| Fields |
|
| Buttons |
|

| Screen Objective | This screen allows the user to configure the destination NAT configuration on a selected interface. |
| Navigation |
|
| Fields |
|
| Buttons |
|
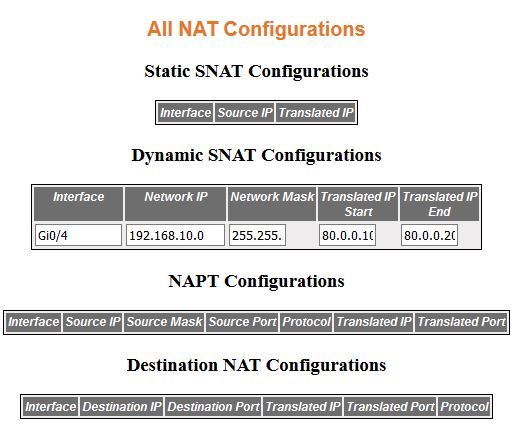
| Screen Objective | This screen displays information about all parameters in Static SNAT Configuration, Dynamic SNAT Configuration, NAPT Configuration, and DNAT Configuration. |
| Navigation |
|
