This section describes how to configure the Dynamic Host
Configuration Protocol Client on the switch.
DHCP Client (Dynamic
Host Configuration Protocol Client) client uses DHCP to temporarily receive a unique
IP address for it from the DHCP server.
It also receives other network configuration information, such as
default gateway, from the DHCP server.
To access DHCP Client screens, go to .
Enabling DHCP Client
By default, the tab
DHCPC Option Type displays the DHCP Option Types Settings screen.
Figure 1. DHCP Client Global Configuration

| Screen Objective |
This screen allows the user to enable the DHCP Client functionality. |
| |
| Navigation |
|
| Fields |
- Global Status—select
either enabled or disabled.
|
| Buttons |
- Apply—modifies
attributes and saves the changes.
|
DHCP Option Type Settings
Figure 2. DHCP Option Type Settings
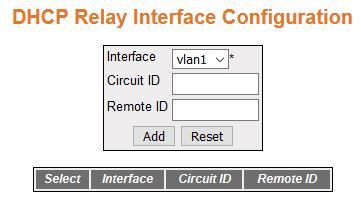
| Screen Objective |
This screen allows the user to configure basic DHCP Relay information. |
Note: To enable DHCP Relay, DHCP Server
Status should be disabled.
|
| Navigation |
|
| Fields |
- Select—click
to select an interface for which DHCP option
type configuration needs to be modified or deleted.
- Interface Name—select an interface for
which DHCP option type settings
to be configured from the list of VLAN interfaces
already created in the system.
|
| Fields |
- Option Type/ DHCP Option
Type—select the DHCP Client
Option Type for the specified interface created in the system. The
list contains:
- TFTP Server
Name (IP Format/String)—sends the TFTP requests
to get the TFTP server’s domain
name
- Bootfile Name (String)—sends the DHCP requests
to get the boot File Name.
- Vendor Specific (String)—sends the DHCP requests
to get the Vendor Specific details.
- NTP Servers (IP Format)—sends
the DHCP requests to get the NTP server IP.
- DNS Servers (IP Format)—sends
the DHCP requests to get the DNS server IP.
- SIP Servers (IP Format/String)—sends
the DHCP requests to get the SIP server information.
- Option 240—sends the DHCP requests
to get the Option 240 information.
- Option Code/DHCP Option Code—displays
the Option code for the specified interface created in the system.
When option code is displayed as:
- 66—indicates TFTP Server Name (IP Format/String)
is set. This allows to identify a TFTP server
when the same field in the DHCP header
is used for DHCP options
- 67—indicates Bootfile Name (String) is set. This allows identifying
a bootfile when the file field in the DHCP header
is used for DHCP options.
- 0—indicates no option type is set for the interface
- 60—indicates Vendor Specific (String) is set. This allows identifying
a vendor specific when the file field in the DHCP header
is used for DHCP options.
- 42—indicates NTP Servers (IP
Format) is set. This allows identifying NTP Servers
when the file field in the DHCP header
is used for DHCP options.
- 6—indicates DNS Servers (IP
Format) is set. This allows identifying a DNS Servers
when the file field in the DHCP header
is used for DHCP options.
- 120—indicates SIP Servers
(IP Format/String) is set. This allows identifying SIP Servers when the file field
in the DHCP header is used for DHCP options.
- 240—indicates Option 240 is set. This allows identifying Option
240 when the file field in the DHCP header
is used for DHCP options.
- 0—indicates no option type is set for the interface.
- Option Value/DHCP Option Value—enter
an value to identify the octets of data, of length specified by
length for that entry. This value will be taken from DHCP ACK message
which is sent from server to client.
Note: This field is enabled
only when DHCP Option Type is
set as Vendor Specific (String).
|
| Buttons |
- Create—adds
and saves new configuration.
- Reset—resets to default value for respective
fields and discards all user input.
- Apply—modifies attributes and saves the
changes.
- Delete—deletes the selected entry.
|
DHCP Client Identifier Setting
Figure 3. DHCP Client Identifier
Setting
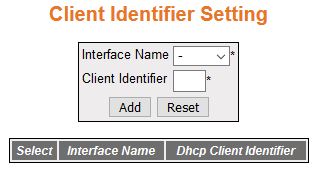
| Screen Objective |
This screen allows the user to configure DHCP client identifiers for the
interfaces created in the system. The client identifier is advertised
in the DHCP control packets. |
| Navigation |
|
| Fields |
|
| Buttons |
- Add—adds and
saves new configuration.
- Reset—resets to default value for respective
fields and discards all user input.
|