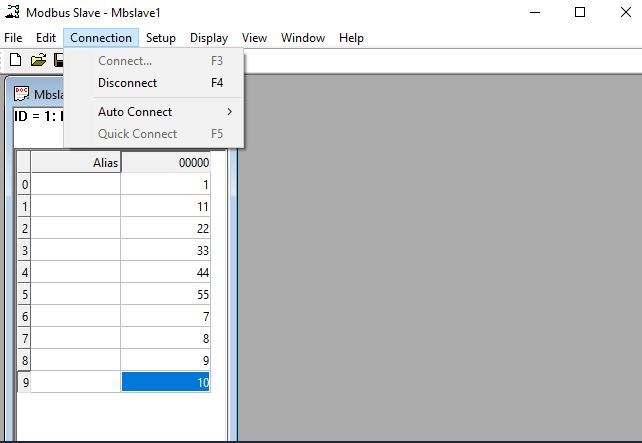
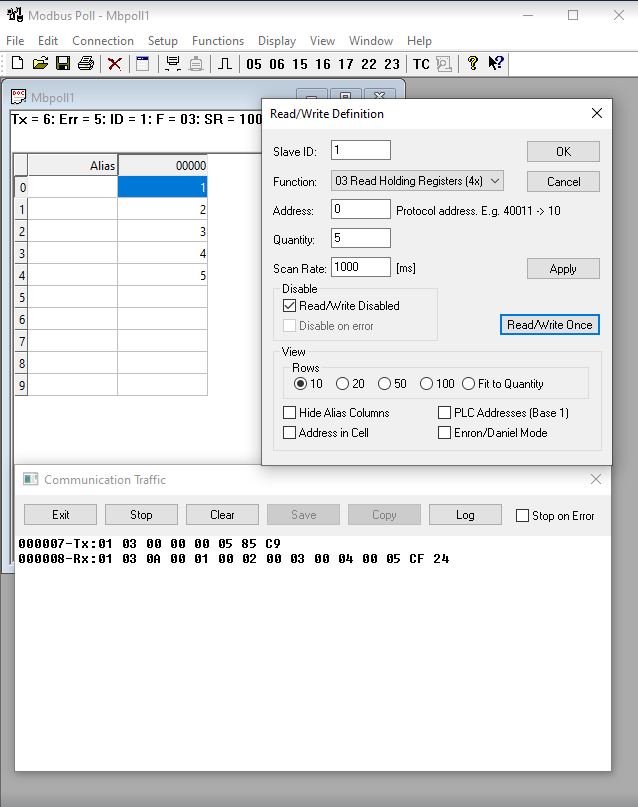
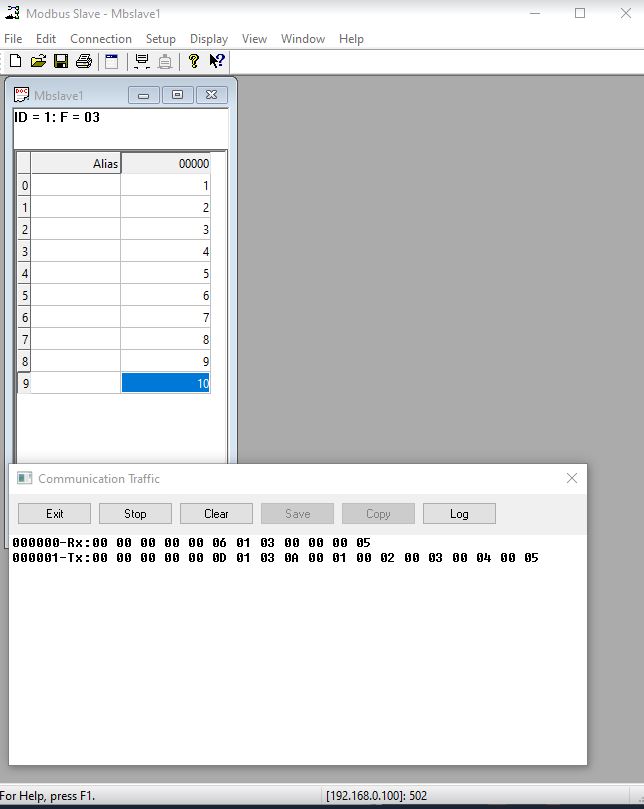
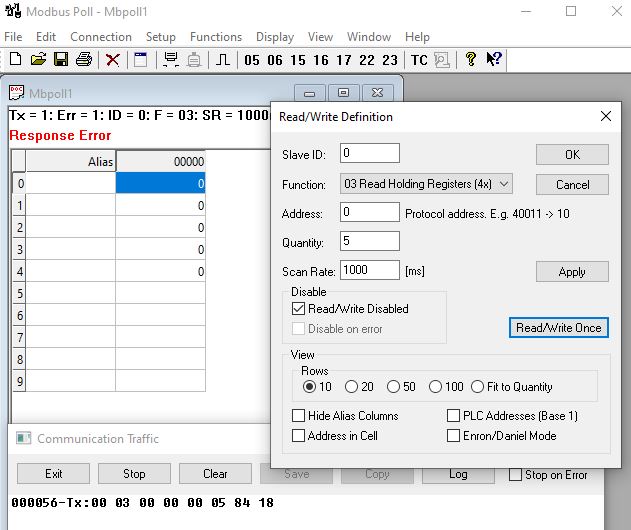
Connecting to Server
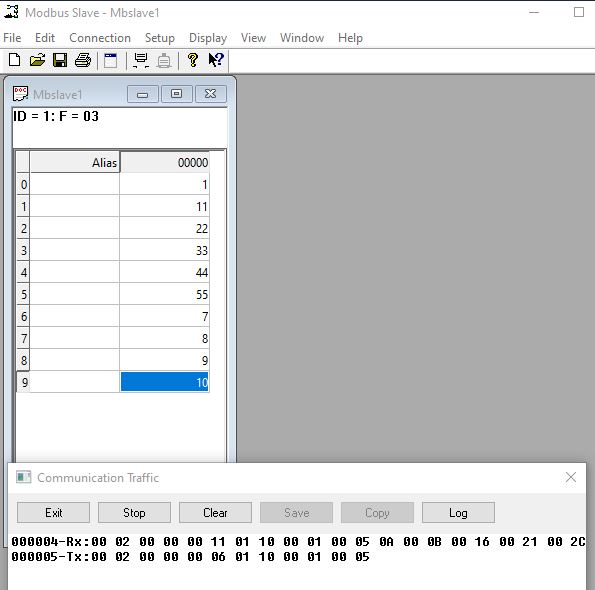
- Start Server (Modbus Slave App) to accept
connection from the client. The default Slave ID will be 1.
Perform the following:
Figure 1. Modbus Slave App - Connection Setup
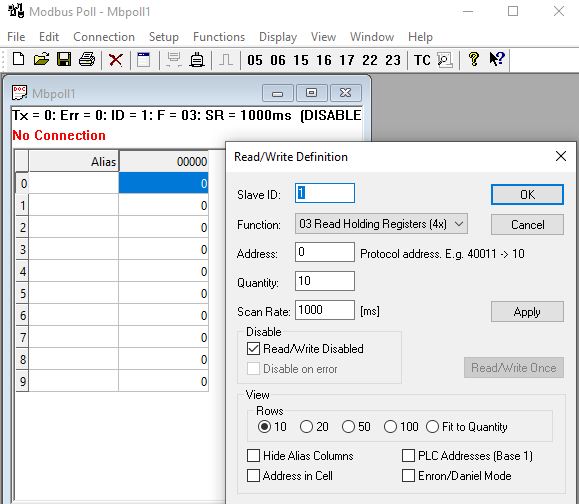
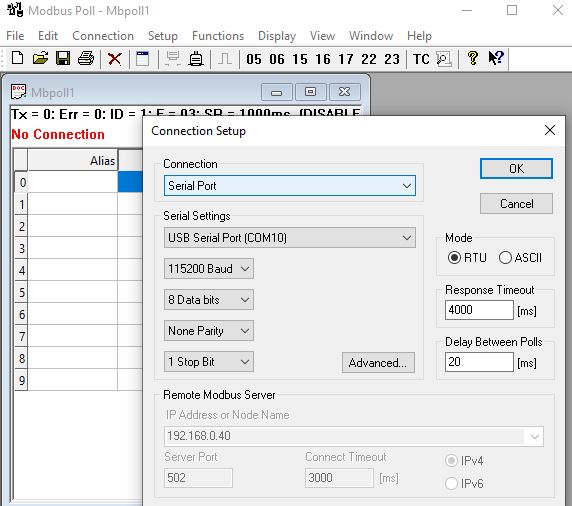
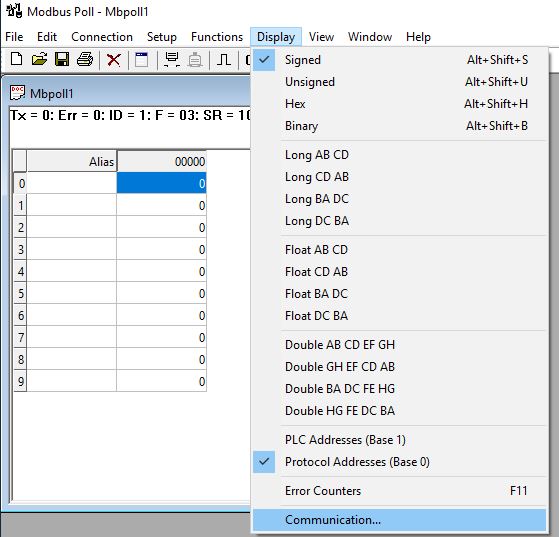
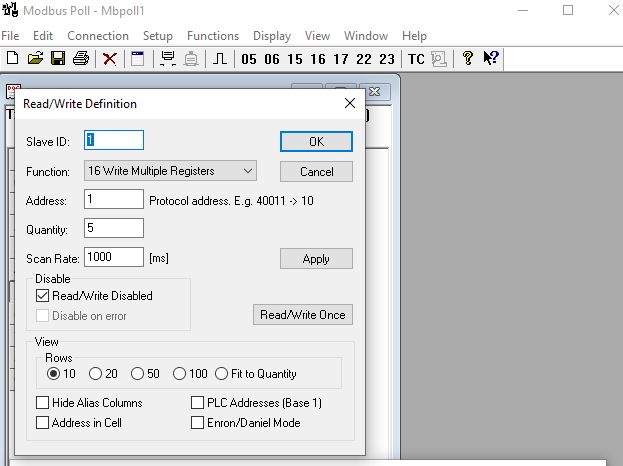
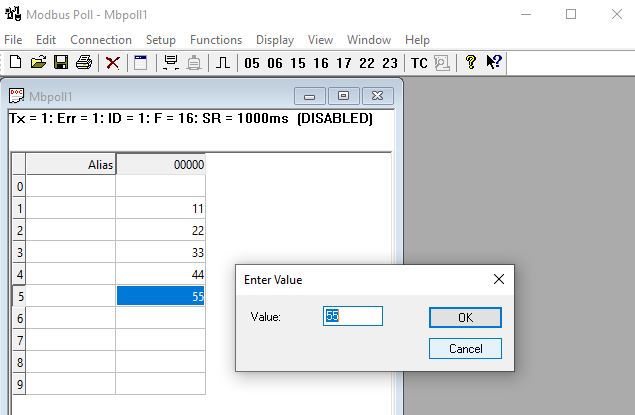
This section lists the CLI configuration steps for TCP Client Configuration for MODBUS connection.
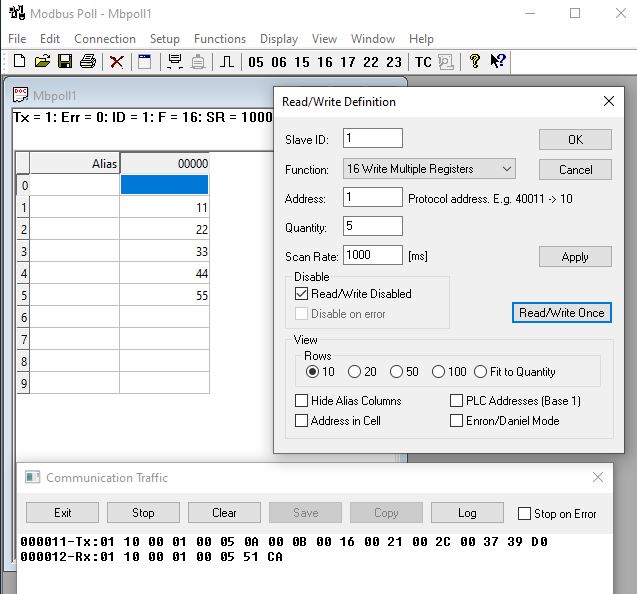
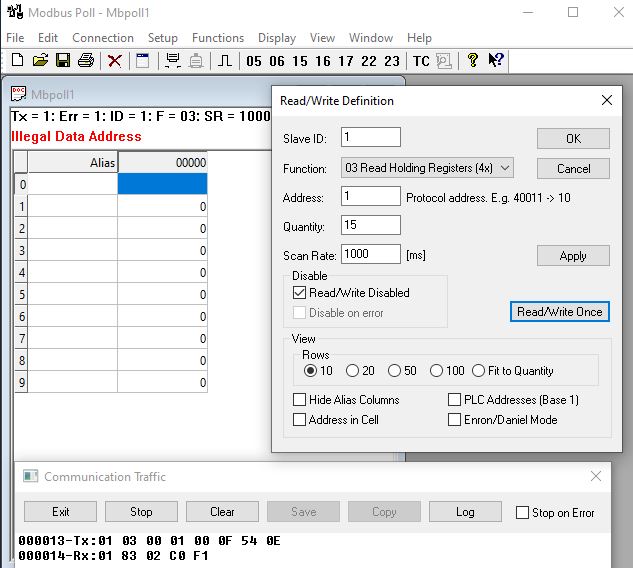
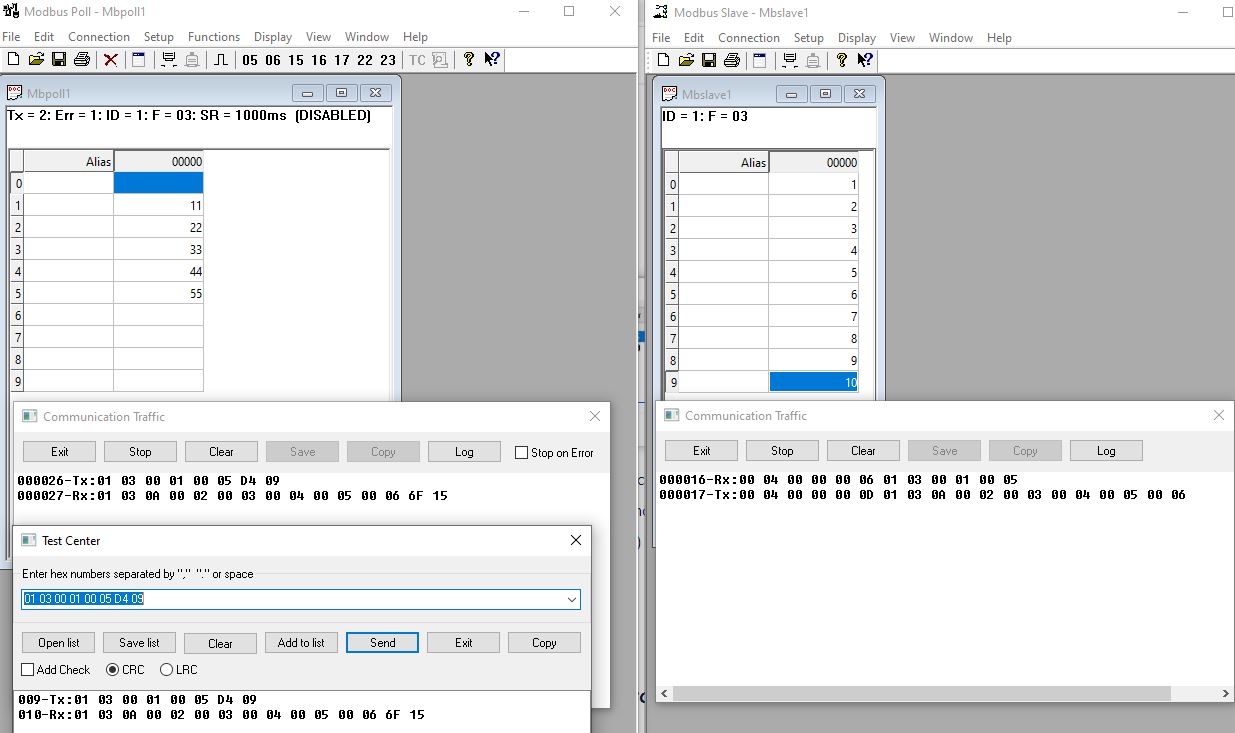
Type the following:
Phoenix_Contact# configure terminalPhoenix_Contact(config)# interface vlan 1Phoenix_Contact(config-if)# no shutdownPhoenix_Contact(config-if)# ip address 192.168.0.40 255.255.255.0Phoenix_Contact (config-if)# endPhoenix_Contact# configure terminalPhoenix_Contact(config)# interface serial 0/9Phoenix_Contact(config-serial-if)# baud-rate 115200Phoenix_Contact (config-serial-if)# no shutdownPhoenix_Contact (config-serial-if)# endPerform the following:
Type the following:
Type the following:
Type the following:
Type the following:
Type the following:

Perform the following.

Perform the following.
Perform the following.
Perform the following.
Perform the following.
Perform the following.
Perform the following.
Perform the following.
Perform the following.
Perform the following.
Perform the following.

Perform the following.

Perform the following.
Perform the following.
