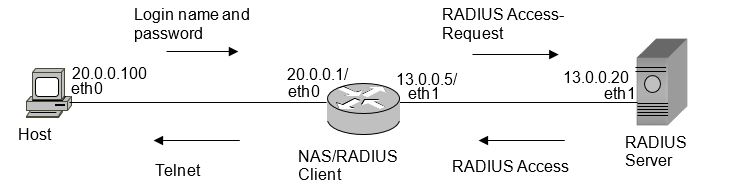
At RADIUS Server
A. Single Mode RADIUS Authentication
The freeRADIUS server code is used for this configuration. Customize the following sample files available in the raddb directory (available in the path \etc\raddb in Linux). Execute the following command to view the system information:
- users
- clients.conf
- radiusd.conf
An example is shown below.
- At Host:
B. Multiple Level Role-Based Authentication (RBAC) - FreeRadius
Role-based access control (RBAC) restricts network access based on a users' role in a network.The methods of authentication as shown below are Password Authentication Protocol (PAP), Challenge Handshake Authentication Protocol (CHAP), and MS-CHAPv2.
PAP
For PAP, when logging into a network resource, the user has to supply a username and a password which are sent in clear text format.
After completing the installation of ubuntu-20.04.2.0-desktop-amd64 system (the image can be downloaded from https://ubuntu.com/download) on Vmware player and integrating it (bridging it) with your network, implement the following steps to install, configure, and test RBAC
To install and configure a free RADIUS with a new dictionary file, implement the following configuration steps
MS-CHAPv2
CHAP stands for Challenge Handshake Authentication Protocol. When logging in a network, the user provides a username and a secret password which is authenticated through a 3 way handshake process. MS-CHAP is the Microsoft version of t CHAP. The protocol exists in two versions, MS-CHAPv1 (defined in RFC 2433) and MS-CHAPv2 (defined in RFC 2759). MS-CHAPv2 provides mutual authentication between peers by piggybacking a peer challenge on the Response packet and an authenticator response on the Success packet.
set radius enableradius-server host 192.168.10.170 auth-port 1812 timeout 6 retransmit 6key IS5ComRadius primarylogin authentication radius localset radius protocol-mode ms-chapv2/etc/freeradius/3.0/sites-enabled/defaultC. Multiple Level Role-Based Authentication (RBAC)- Windows Server 2016
To configure a RADIUS server with Password Authentication Protocol (PAP) or MS-CHAPv2 for three users privilege levels, first, we need to create Active Directory as the VSA (vendor specific attribute) should be assigned to a group of users, and not to an individual.
Creating Active Directory
This section gives details on creating active directory.
perform the following.
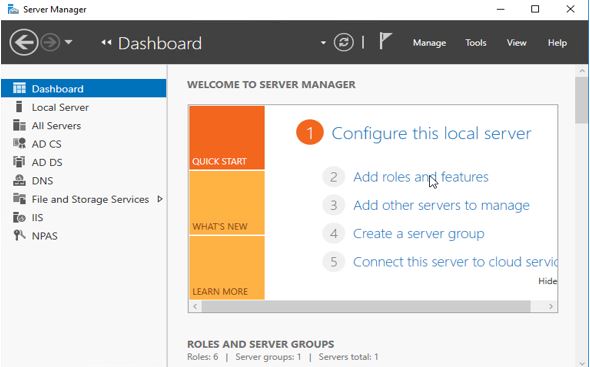
Click Add roles and features. Keep clicking Next until you reach Select server roles page.
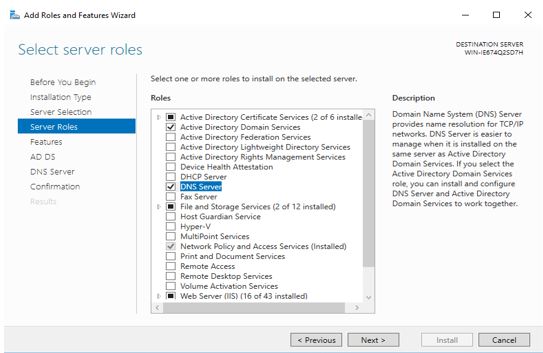
2. Then, choose by adding check marks Active Directory Domain Services and DNS server. Then keep clicking Next until you get the confirmation page. Click Install.
3. If the server is successfully installed, as a result the following web page appears.
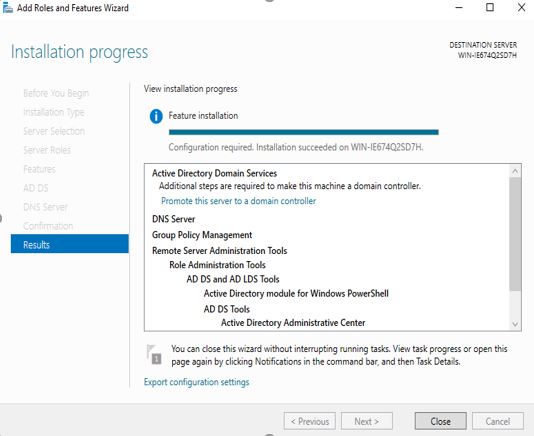
4. Click Close to exit the wizard.
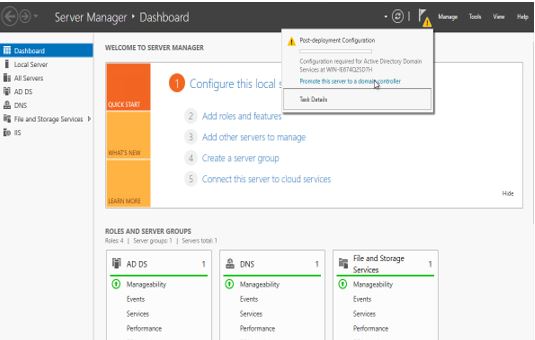
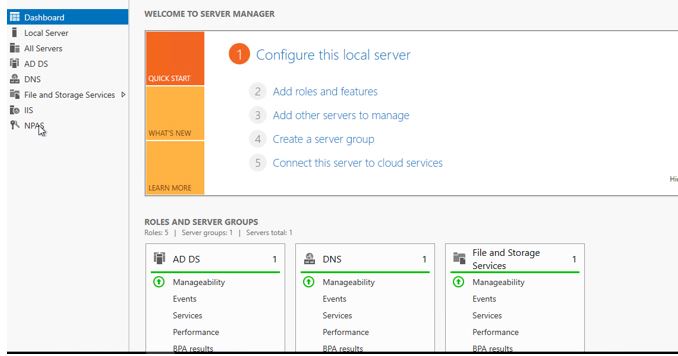
Go to the Dashboard again. The WELCOME TO SERVER MANAGER page appears with a strip with one red and 2 yellow rectangles on the left side.
Click it and start promoting the server to domain controller. The post-deployment Configuration appears.
5.

5. The Deployment Configuration page appears. In the Select the deployment operation area, click to select Add a new forest.In the Root Domain name box, type the domain name is5com.com as shown below. Click Next.
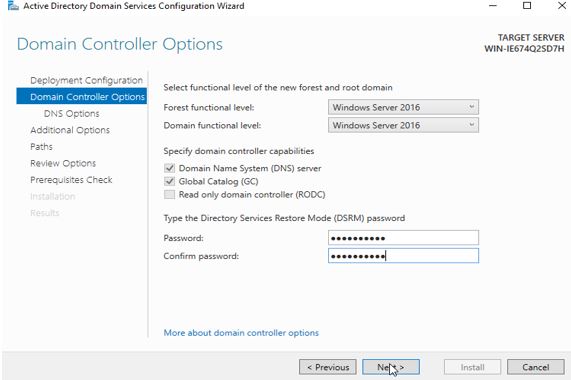
6. The Domain Controller Options page appears. Type the Directory Services Restore Mode (DSRM) password and click Next.
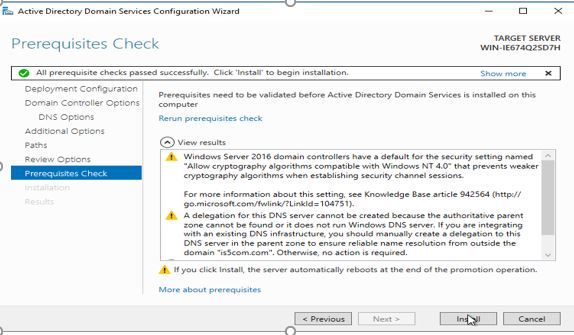
7. Keep clicking until you reach Prerequisites Check page. If everything is OK, click Install and wait until the View Results page closes. Then, restart.

8. After restarting, go to Dashboard, then, choose Tools. After that, from the right-click sensitive menu choose Active Directory Users and Computers. Create 3 users and 3 groups as shown below (each group and user will be in different privilege level).
- Group is5-admin will have is5.admin user.
- Group is5-tech will have is5.tech user.
- Group is5-guest will have is5.guest user.

Creating NAP for the RADIUS server
perform the following.
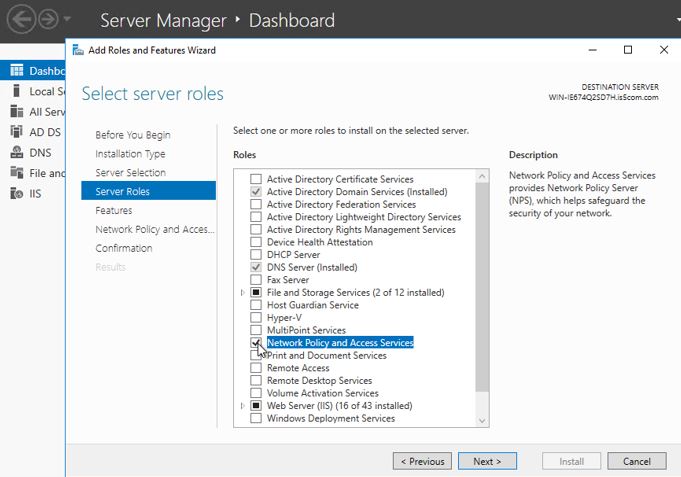
Click Add roles and features. Keep clicking Next until you reach Server Roles.Then, choose by adding check marks Network Policy and Access Roles Services. Then keep pressing Next until confirmation page appears, then click Install.When finished, clickClose.
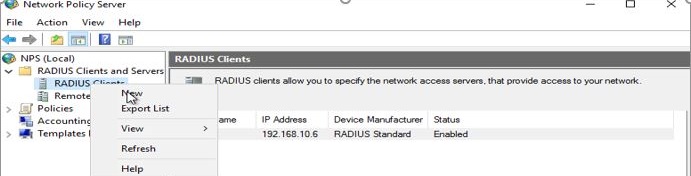
2. In the left pan of the main dashboard, choose NPAS.
Then, right click and choose Network Policy Server.

3.
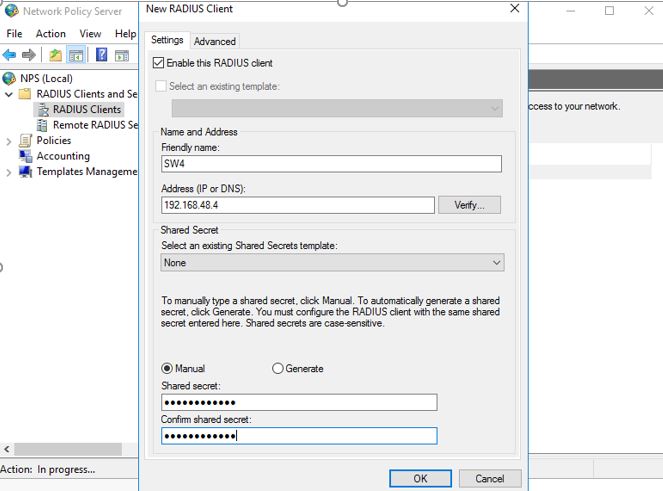
3. Add a RADIUS client considering that the shared secret is the same as the one used on Raptor.
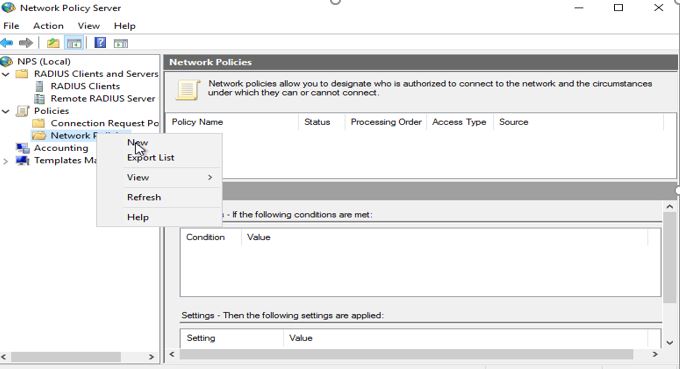
4. Go to Network Policies and delete all existing ones. Then, create 3 policies for is5 for the different three privileges levels.
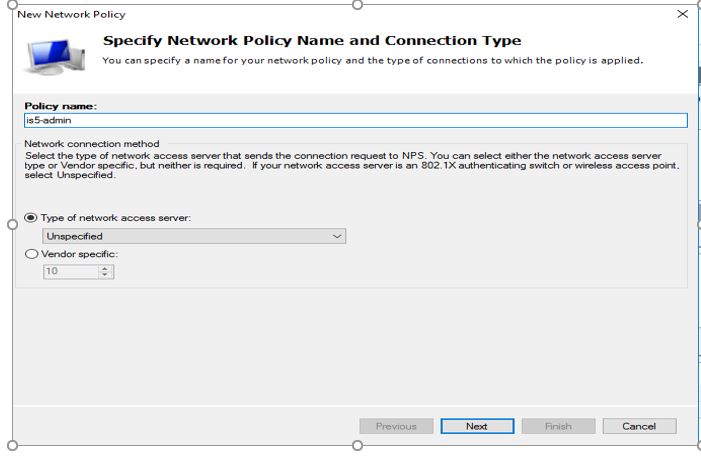
5. Click Next, then choose the group you want to add for this policy as a condition. Since the policy name is is5-admin, it is suggested that you add an is5-admin group that contains one user which is is5.admin user.

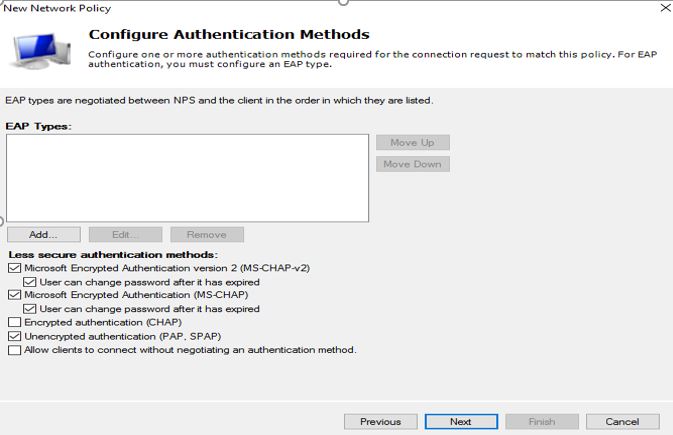
6. Click Next and choose Access granted. Then, press Next. In Configure Authentication Methods, choose both MS-CHAPv2 and PAP to make one policy for both.
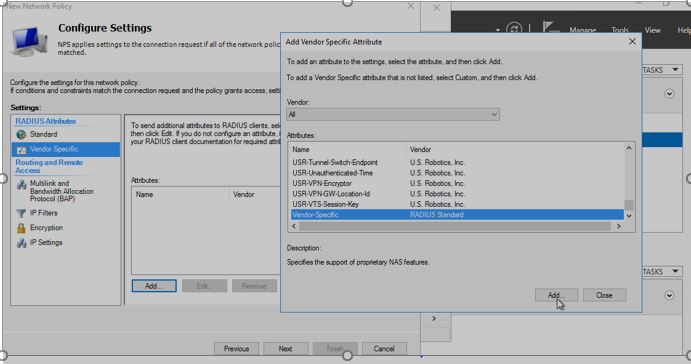
7. Click Next. Then, in Configure Settings page choose Vendor Specific. Click Add. Then again, in the Add Vendor Specific Attribute page, choose Vendor Specific and click Add.
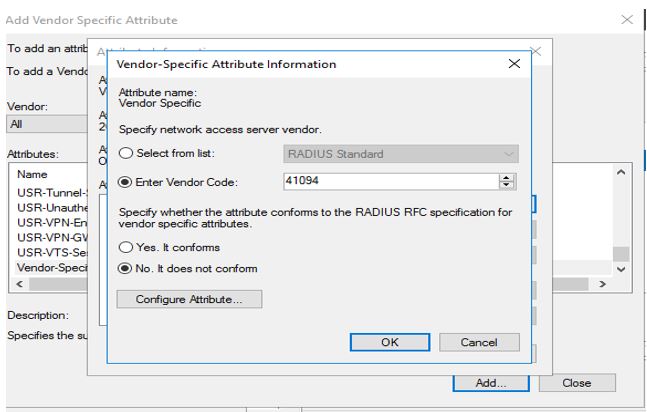
8. Click Add, then in Enter Vendor Code field, select 41094.
9. Choose Yes, it conforms, and then, click Configure Attribute.
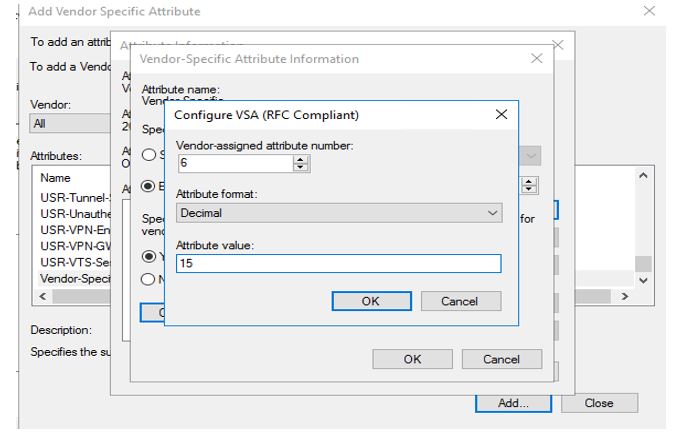
In the Attribute value field, add a privilege number. If you put it 7, it will be privilege 7, and if you put 1, it will be privilege 1.
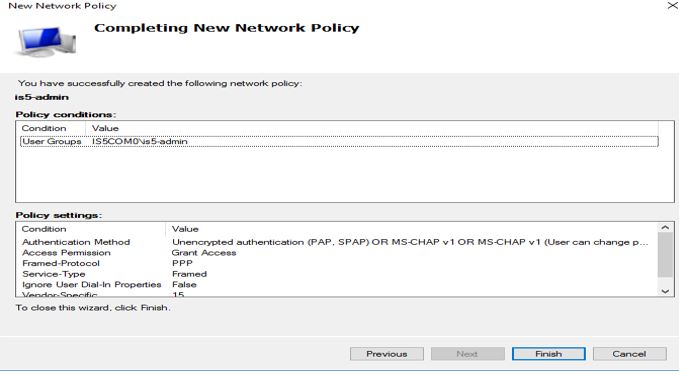
10. Click Finish.
11. In the very same way, add admin and tech and guest policies.

12. After that, right-click on the main Network Policy Server (NPS), and choose Register server in Active Directory. Then, click OK twice.
If you made any changes to the policies, right click on the NPS again and stop NPS service. Then, choose start NPS service.
13. Use CLI in Raptor (Tera Term or equivalent) and enter the following commands.
set radius enableadius-server host 192.168.10.230 auth-port 1812 timeout 1 retransmit 1 key IS5ComRadius primaryIf you want to work in MS-CHAPV2 instead of PAP, add the below shown command to the previous ones.
set radius protocol-mode ms-chapv2Now, we can use the username and password created previously and grant the privilege level assigned the group that these users belong to.