This section describes how to configure a simple firewall.
The steps needed to enable the iMX950 security features must have been performed. This document assumes that the steps listed in the Configuring the Security Application or Configuring the Security Application via the WebUI section were performed.
This section will begin by enabling a simple firewall. Once enabled, rules and complexity will be added as a means of providing with a greater understanding of how to use the iMX950s firewall capabilities.
For reference the network that will be used for these exercises will be as shown:

- From a host on interface gig 0/2 you should be
able to ping a host on the network at gig 0/3
ping 10.0.0.2
You should see som
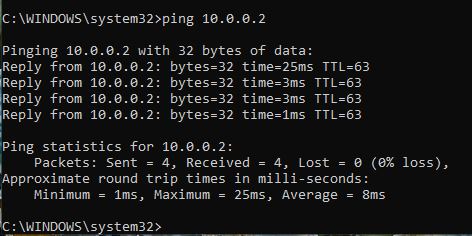
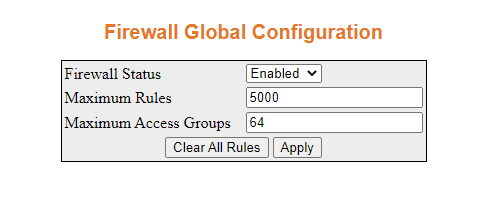
ething similar to the following image: - Enable the firewall.
- Navigate to Home > Layer 3 Management
> Security > Firewall > Global Configuration.
You will see a page similar to the following.
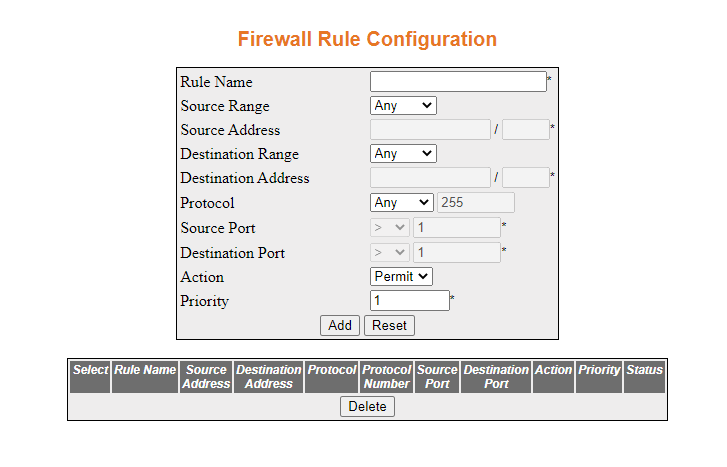
- Navigate to Home > Layer 3 Management >
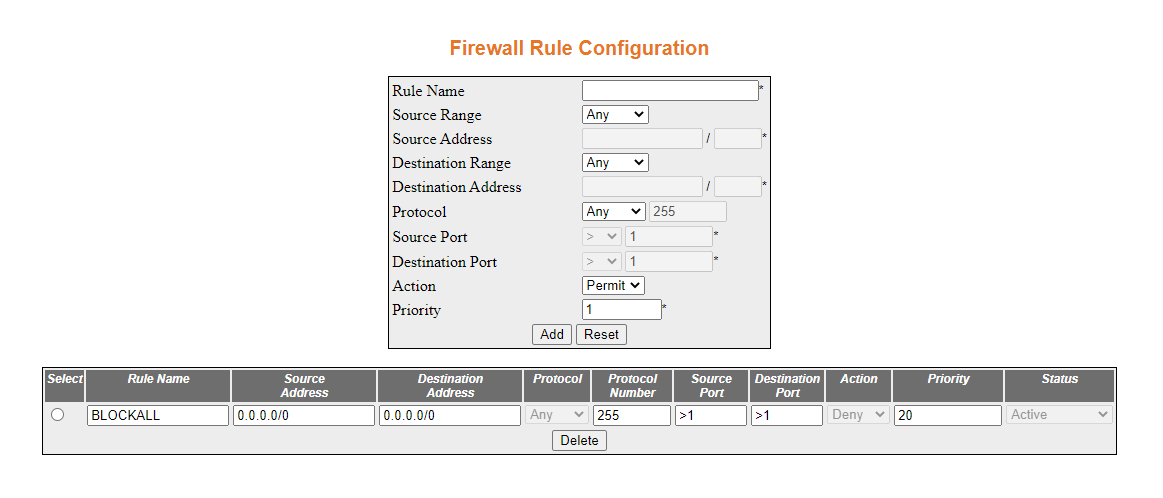
Security > Firewall > Rule Configuration
You will see a page similar to the following:
- Configure the firewall rule configuration as shown
below, and then click Add
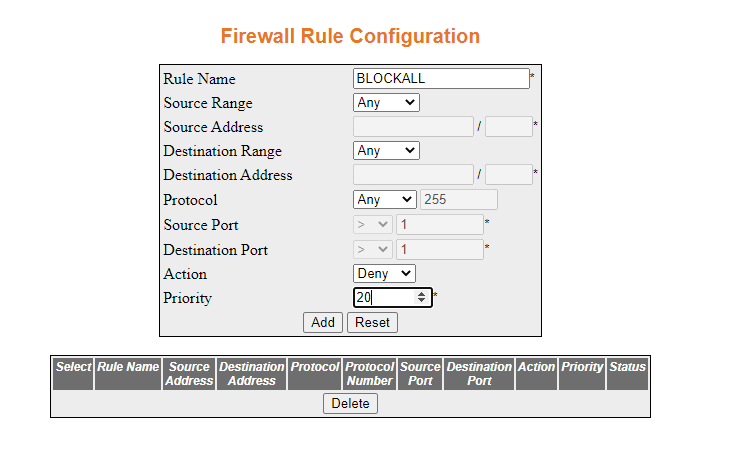
The rule will be added as shown below.
- Navigate to Home > Layer 3 Management >
Security > Firewall > Access Group Configuration
A page similar to the following will appear.

- Configure the access group as shown and then click Add.
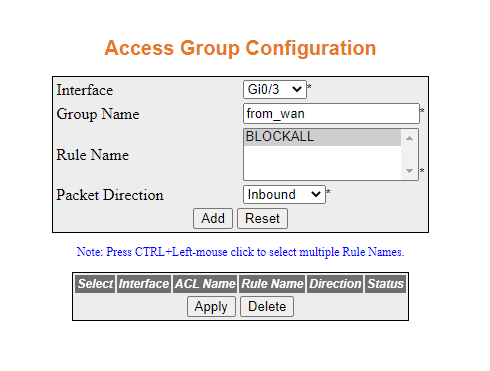
The following will appear.
- Navigate to Home > Layer 3 Management
> Security > Firewall > Global Configuration.
- Note:Add a rule to permit a host on the outside to ping the inside.
The priority of the rules are important. As soon as a packet is denied it will be discarded.
The lower the number the higher the priority.- Navigate to Home > Layer 3 Management
> Security > Firewall > Rule Configuration
The following screen will appear.

- Configure a rule as shown, then click Add

The rule will be created as shown.
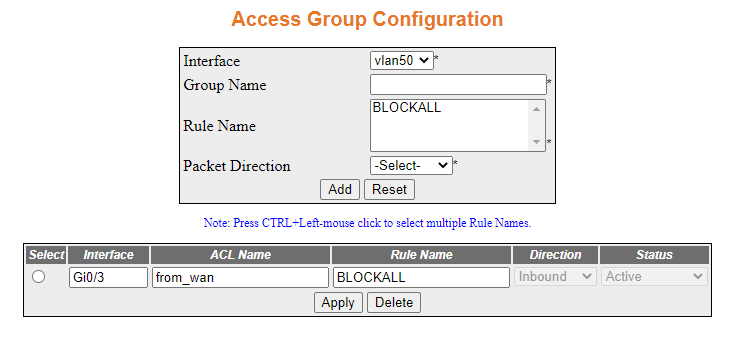
- Navigate to the Access Group Configuration,
select the row with interface Gi0/3 and in rule name type “From_switch,”
immediately before “BLOCKALL” as shown.
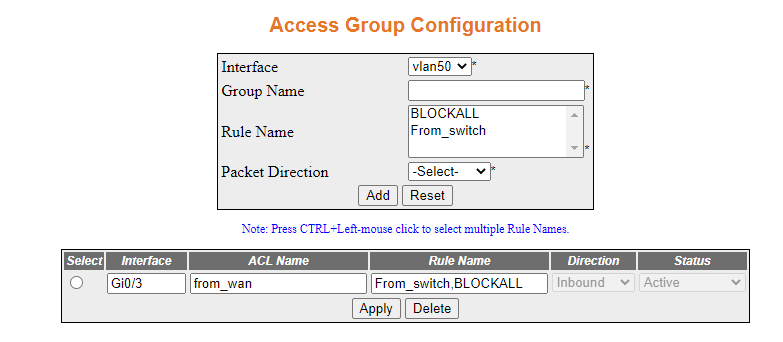
Then click Apply.The rule will be added to the firewall.
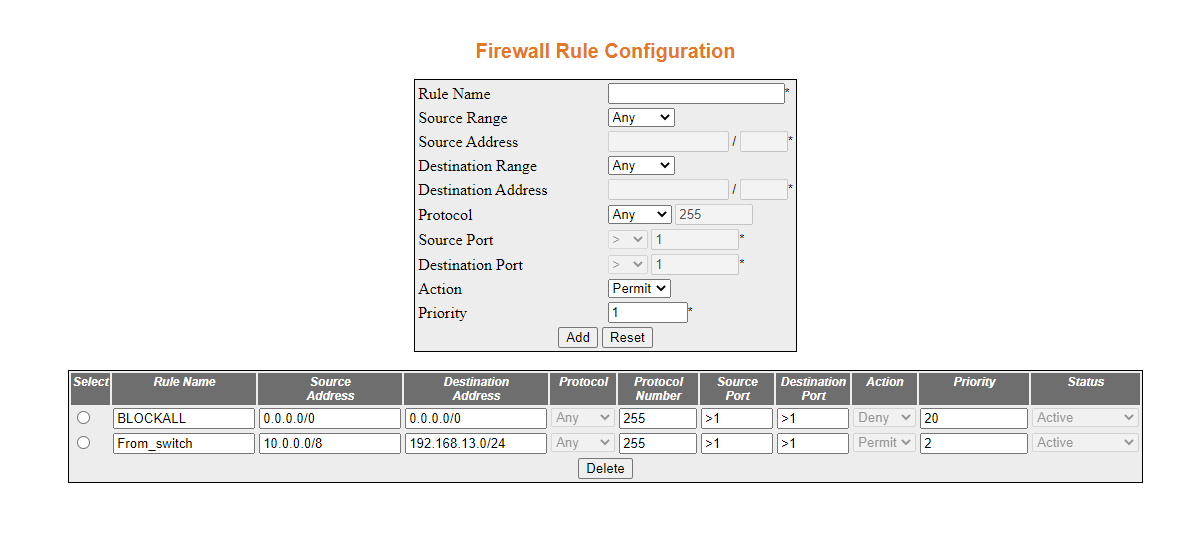
- Navigate to Home > Layer 3 Management
> Security > Firewall > Rule Configuration
- Set up rules to allow the Inside to only access a single
HTTP address.
- Navigate to the Rule Configuration page.
Enter the following values shown below. Then click Add.
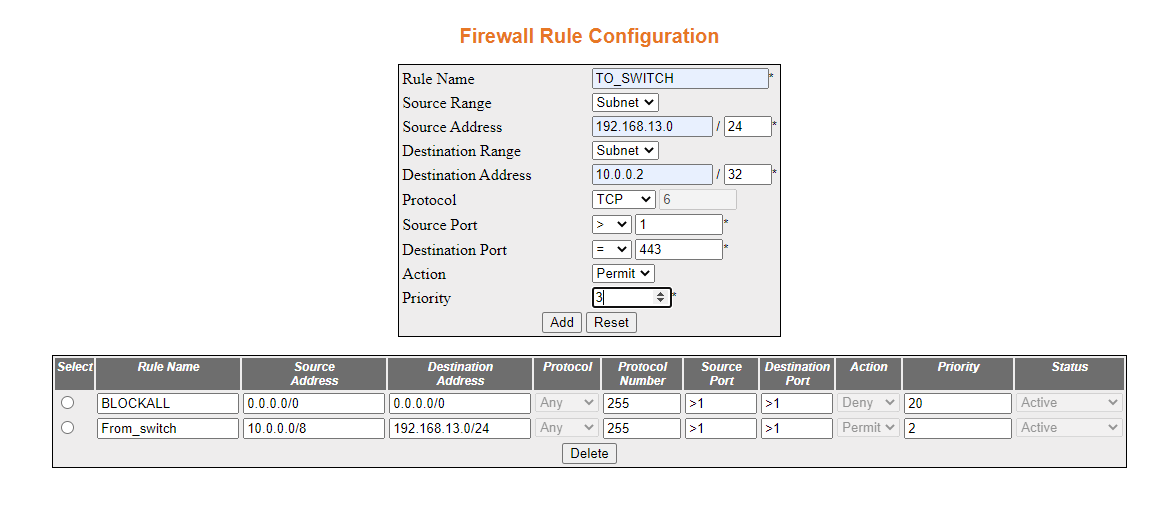
The rule will be created.
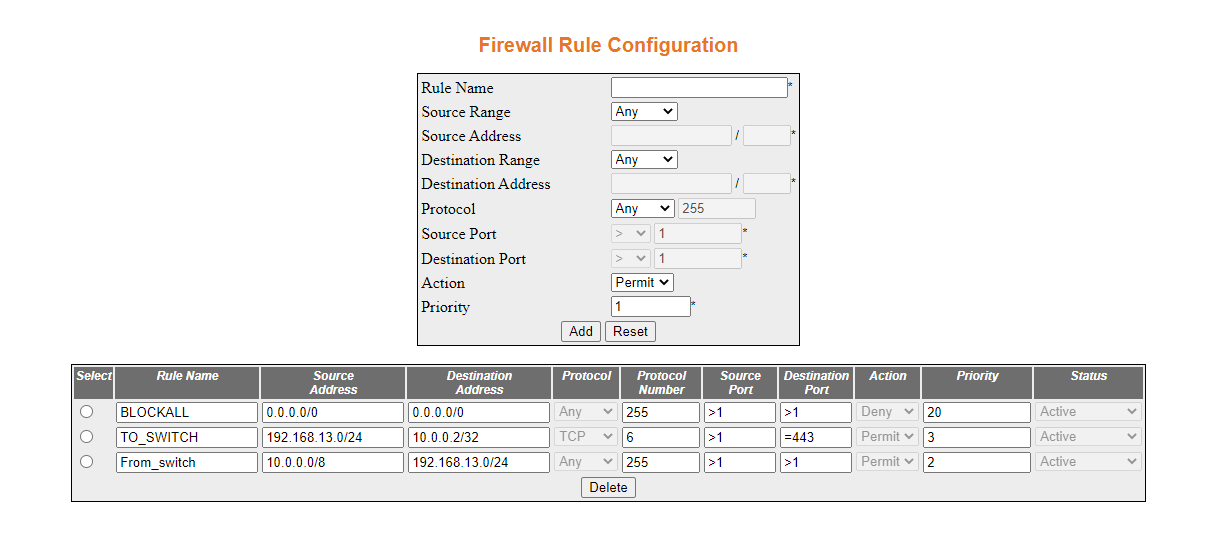
- Create an access group with the TO_SWITCH rule. Navigate
to Access Group Configuration. Populate
the fields and selections as shown below, then click Add.

The following screen will appear.

The rule has been configured. - Navigate to the Rule Configuration page.
Enter the following values shown below. Then click Add.
By the end of this section you will have successfully done the following:
- Enabled a firewall
- Applied policies to inbound traffic
- Applied policies to outboud traffic
- Prioritized rules
- Are able to execute commands which show the state of the firewall